Master Data Input Tool Installation Guide
This section describes how to install the Master Data Input Tool.
Prerequisites
- The following must be installed.
- Eclipse
- Maven
- The project must be generated from the Nablarch archetype .
- Table must be created
- The table is already created in the backup schema[1]
| [1] | For information on creating backup schema and its tables, see Environment construction of “Master Data Recovery Function”. |
Method of provision
This tool is provided in nablarch-testing-XXX.jar.
Before using the tool, you compile the project and download the jar file needed to run the tool, so that we can use the same DB settings as the project unit tests. Execute the following command.
mvn compile
mvn dependency:copy-dependencies -DoutputDirectory=lib
Download the following file and extract the file with the directory to the project directory (where the pom.xml exists).
The configuration file included in the above ZIP file is shown below.
| File name | Description |
|---|---|
| tool/db/data/master_data-build.properties | Configuration property file |
| tool/db/data/master_data-build.xml | Ant build file |
| tool/db/data/master_data-log.properties | Log output property file |
| tool/db/data/master_data-app-log.properties | Log output property file |
| tool/db/data/MASTER_DATA.xlsx | Master data file |
Rewrite a property file
Configure the backup schema name used by the master data automated recovery function.
# Master data backup schema name for test
masterdata.test.backup-schema=nablarch_test_master
Other configuration values do not need to be modified as long as the directory structure remains the same.
Placement
Place it directly under <main project>.
Integration configuration with Eclipse
This tool can be launched from Eclipse with the following settings.
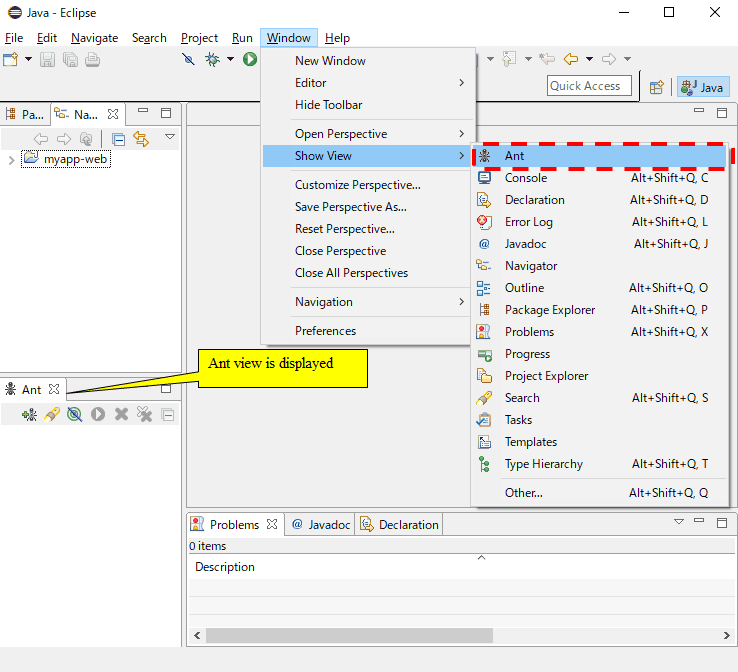
Build file registration
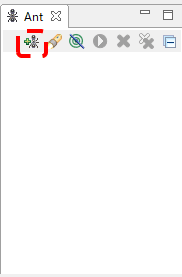
Click the + icon and select the build script.
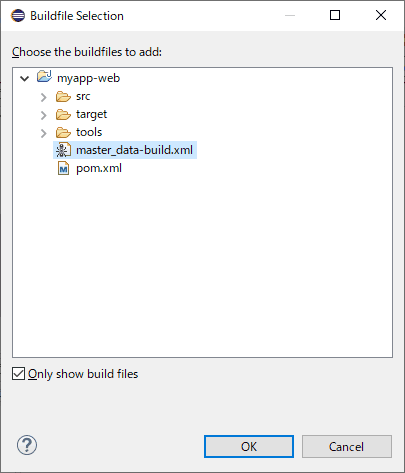
Select the Ant build file (master_data-build.xml).
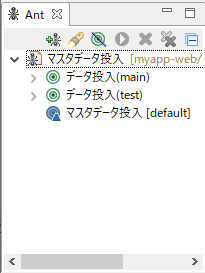
Confirm that the registered build files are displayed in the Ant view.